The Process: Bruder Klaus Field Chapel
Time-lapse of the making of the Bruder Klaus Field Chapel Model
After analysing the plans and sections gathered on the Bruder Klaus Field Chapel by Peter Zumthor I began to construct the internal structure. This began with testing the best timber dowels that could be burnt, and I decided on using birchwood timber as it burnt fairly easily.
Once the birchwood timber dowels where selected, I set up a laser cutting file that would be used as the floor plate and the base that the 114 timber dowels would sit in to create a stable structure. Originally cut from thick 6mm timber sheet, I decided to change the base to corrugated card, as it would burn easier in the later stage of the process.
 |
Laser cutting base from corrugated card
|


Once all the sticks were cut I used the timber base I originally cut to hold the dowels which made it easier to quickly assemble the final tee-pee.
 |
Final interior tee-pee structure
  |
Once the structure was complete there was still lots of gaps within the structure. To ensure that the casting would not seep through I applied a layer of PVA glue then filled the remaining gaps with hot glue.
FORM WORK BOX
The irregular five-sided external built form would be created by building a framework from form-wood ply. Because of the angles of this box it proved to be quite difficult.
 |
| First attempt of form work box |
After the first attempt we realised that we forgot to add the grooves in the material to represent to stages of construction, without having to pour the model in 24 stages which would save a considerable amount of time in model making. We also did not get the angles 100% correct.
Before we cut the boards to their final angle and size we cut the grooves so we did not forget a second time. Then Dan cut them to size and angle based on my floor plate on the table saw.

 |
| Dan cutting out the box on the table saw, getting angles from the base plan of the structure |
Once all the pieces were cut I glued 2 sides and screwed the remaining sides to make it easier to remove after the hydrocal had set, and the form work would need to be removed.
 |
| Screwing box together, so it can be easily taken apart |


Final box vs first attempt.
Final I made taller, from thinker form work ply and grooves pre-done.
POURING OF THE HYDROCAL
One the form work box was complete and the internal structure was gap-free it was time to pour the hydrocal
BIG MISTAKE: Note to self - Always Triple Check!
After spending a long time ensuring that the tee-pee structure was gap free and all glued. I placed the internal structure in the form work box without realising I didn't seal the doorway. This meant hydrocal started to fill the internal space which I did not want, leaving me to pour it out, seal the doorway and pour again.
Once these issues were resolved the second pour went smoothly.
REMOVING THE FORM WORK BOX
I left the hydrocal to set for 1 week (only needed to leave for 24 hours). It was fairly difficult to remove the form work box as I didn't put any mould release or Vaseline where we had created the grooves to highlight the stages of the concrete pour. However with a chisel and hammer I managed to get it off slowly. The grooves did break way when I took the box apart, however this was the look I wanted, I didn't want it to perfect on the outside, as that would not have looked realistic to the project. I actually used the chisel to roughen the edges further to give it a more realistic look.
Unfortunately when I made the mistake of pouring of the hydrocal without sealing the entrance of the model, I had to pick out some hydrocal that stuck to the inside walls before I could burn it. I carefully did this with a chisel and drill.
 |
| Internal structure before burning |
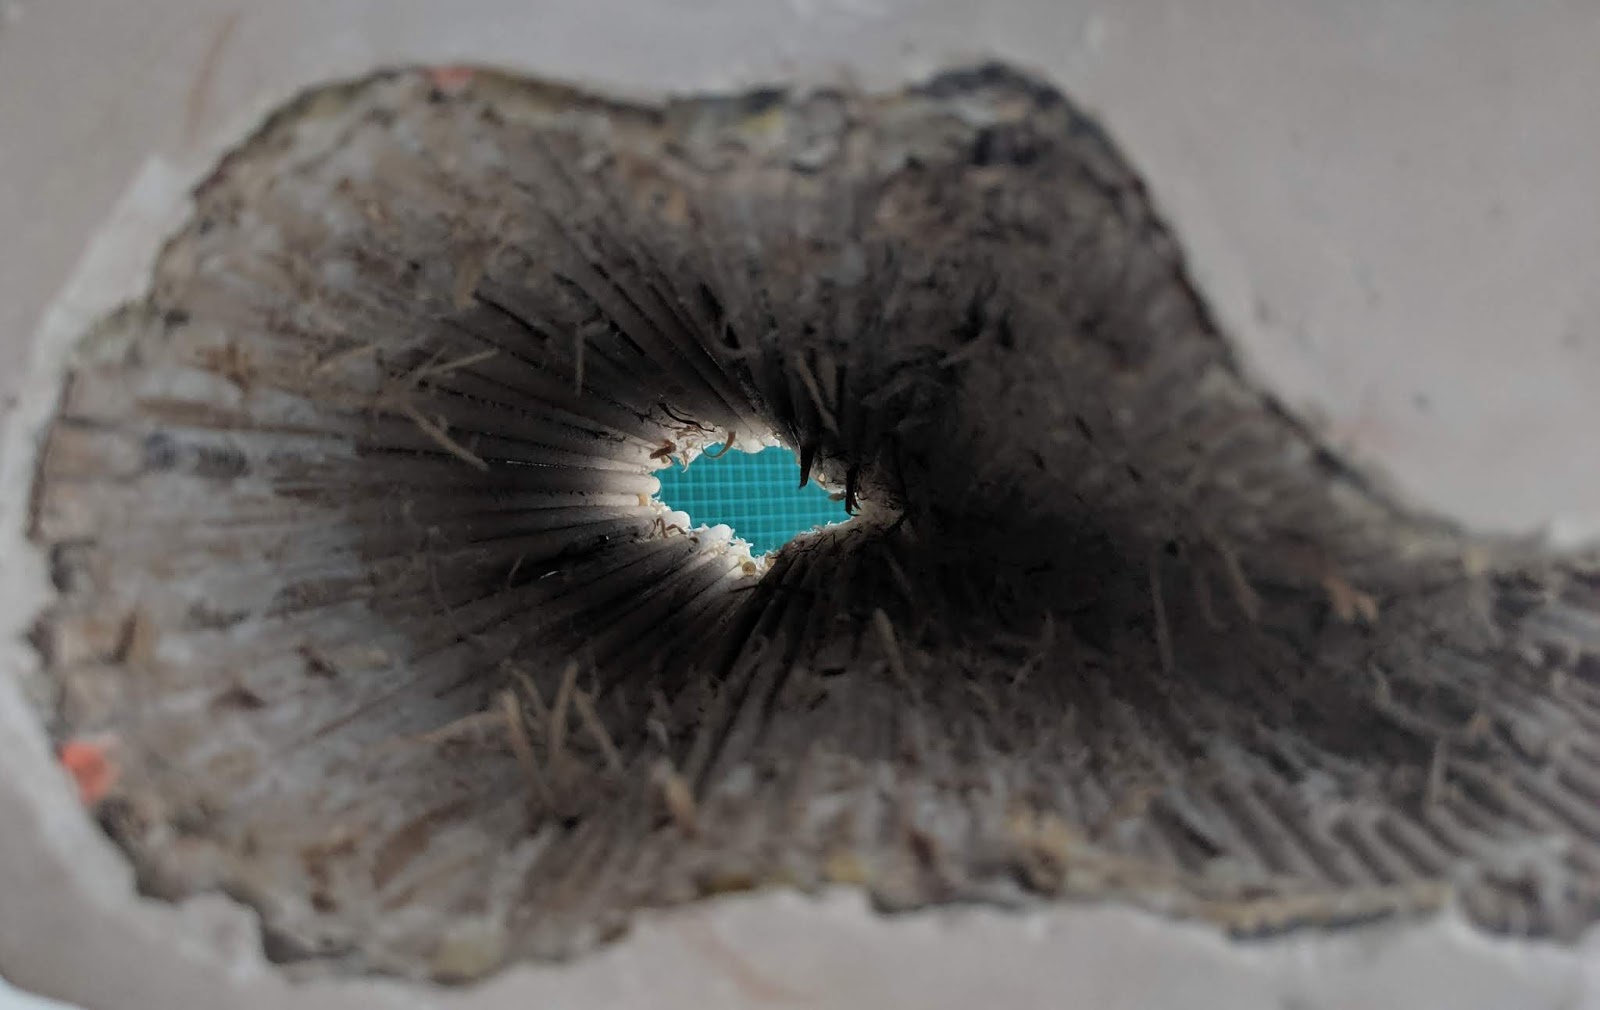
Now for the fun part! I created my own fire starters by wrapping wax in paper towel, this helped me get the fire started. I also raised the model up to get heat underneath it. Although the flames took off, because of the wind I felt like the flames were going around the edges more than through the centre.

I then lowered the building down and put the ashes from the fire I already created underneath it, placing another fire starter inside the model and sticks of bamboo. This really got the fire started. It slowly burnt away the inside timber dowels, although because it was getting dark, I started picking some of the dowels off as they began to break away from the structure. If I had more time, I would have put more dense timber inside it to create a fire that would last longer and leave it overnight so slowly burn away.
The burning is the final stage, once this was complete I went over it with a wet cloth to remove any ash and then photographed it.


WHAT WOULD I DO DIFFERENTLY
1. Place mould release or vaseline on the grooves in the form work box, to allow it to come out of the box easier.
2. Triple check that all holes where sealed, especially around the door.
3. Not have the model raised whilst burning, it would have got hotter and burnt the inside more if it wasn't so open. I lowered the model to the ground towards the end, and this worked much better.
4. Create a hotter, longer lasting fire that would slowly burn the inside.
COST AND TIMING
Overall Cost: $49.00
Overall Time: Approx 20 hours, not including time for hydrocal to set (2hours more than anticipated, I believe this was because of the extra time needed to pick the excess hydrocal off the internal structure)

Comments
Post a Comment